

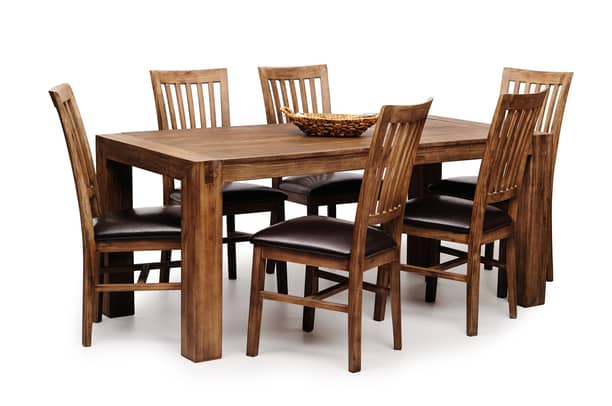
Product photography is a crucial factor if you want to engage your customer on your eCommerce website. Beautifully shot products will always generate more sales than the ones that are not.
If you’re planning to sell some of your furniture for the eCommerce store, you’re going to need some good-quality product photographs. Your furniture photograph should generate a lot of attention among customers if you can follow some simple rules.
Although there are some principles for taking good product shots, we’re here to make the process easy for you. We’re going to talk about lighting, composition, color temperature, and a whole lot to make your products stand out.
Here’s our comprehensive and easy-to-follow guide on how to photograph furniture for your eCommerce store.
Step By Step Guide on Photograph Furniture for Ecommerce Store

Furniture photography has become one of the most popular ways to market furniture. The furniture photography industry has grown significantly since the beginning of the digital age, and today there are hundreds of thousands of professional photographers working in it.
This blog will cover everything from camera equipment to editing techniques and will explain the reasons behind the choices I make in my photography.
Let’s Start…
Step 1: Prepare your Furniture
Do you want to know what makes the best product photograph? Not the expensive camera or location; yes, they are an essential factor.
But attention to detail is the key if you want the best quality photos. It should be no surprise that the furniture you’re trying to sell to a customer should look their best before taking any pictures.
You can start the process by making sure the furniture is clean and dusting them out as much as possible.
Don’t forget to remove all the tags and other forms of distraction. Polish the metal, wood, or leather portions with a polisher or a multi-purpose cleaner.
Your customer wants to product to arrive in pristine condition anyway, so you’re saving yourself from some hassle. Likewise, if you’re selling second-hand furniture, don’t try to hide its imperfections. Showing the scratches or damages beforehand will be appreciated by the buyer.
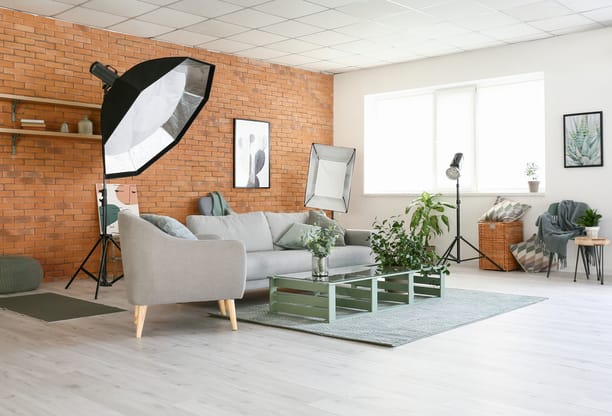
Step 2: Pick up a Right Location
Choosing a good location where your furniture will look best in photographs might be tricky. But don’t worry, we’re here to help.
If you’re shooting at home, make sure it’s beside a big open window for maximum natural light. The place you chose should be at least three times larger than the furniture.
Natural light will look good on the product, but make sure the light isn’t too harsh. You can also use a diffuser or a white piece of paper for diffusing the light.
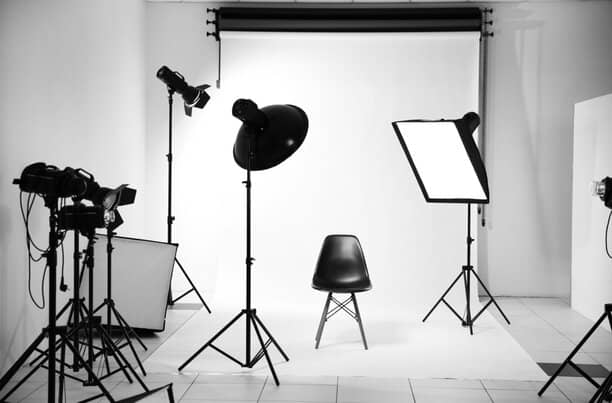
Another essential thing to consider is that the place you’re photographing should remain clean. If you decide to photograph in a studio environment, make sure to use a plain white background as it will be easier to remove during the post-processing.
Step 3: Use a Backdrop

If you want to highlight a single piece of furniture, backdrops are your best bet. In a busy background, it’s hard to focus on the subject. What you need to do is make your furniture the center of attraction.
A seamless white backdrop will make your furniture stand out and look attractive at the same time. If you’re photographing a single piece of furniture, finding a large white sheet of paper shouldn’t be that hard.
But a piece of paper around three times the length of your furniture, put a few clamps together to hang the background.
You can also use a white fabric sheet that might be hanging around in your house; make sure it doesn’t have any wrinkles. A seamless sweep will make your photos look professional, which means the difference between the horizontal and vertical plane is minimum.
Step 4: Use a fill light
Whenever you’re photographing natural light or under studio conditions, don’t forget to add fill light to your product. You can use a reflector or even a plain sheet of paper for bouncing the natural light back to furniture. Fill light ensures two crucial things.
The first one being the fill light will keep the shadows from getting too dark created by the key or the primary light. And secondly, fill light can add dimensions to your furniture and make them look more eye-pleasing.
Step 5: Choose the Perfect Lens
Choosing the correct lens is of paramount importance to your product photography needs. Your best bet on this situation is a telephoto lens which ranges between 50mm and 80mm.
Don’t opt for a macro or a wide-angle lens, as they can distort the furniture. Go for a lens that can optically zoom as far as it can.
Create a significant distance between you and the product you’re shooting for. If you’re too close to the subject while shooting, it can create a warp or distortion, which won’t look good.
Step 6: Keep your Camera Stationary on a Tripod
A tripod might limit your movement while shooting, but its deficiency far outweighs its importance. Sometimes it might be easier to contort yourself for getting the perfect shot you’re looking for.
In that sense, a tripod might restrict your movement or freedom. But once you start using one, you’ll appreciate the special benefits it delivers.
So firstly, keeping a camera stationary on a tripod will give you a sharper result. A handhold shot might look sharp enough, but a tripod is better. Moreover, if you had to go for slower shutter speeds because of the lower light- a tripod is a must for situations like this.
More importantly, keeping your camera stationery will keep your hands free. You can use that to set up your set more effectively. Most importantly, a tripod will keep your shots consistent from image to image.
Step 7: Use a Small Aperture for the Lens
The furniture you’re trying to take a photograph of might be massive and take a lot of area on the camera’s focal plane. If you’re using a telephoto lens, you might get into focusing issues, as we mentioned above.
Using a large aperture along with a longer focal length might not focus all your product at the same time. It’s not an error; it’s more like how human eyes and cameras visualize things.
A large aperture will create a shallow depth of field, which might not focus all the subjects simultaneously. Solution? Using a smaller aperture, so everything remains at a crisp focus at the same time.
But using a smaller aperture means limiting the light that enters into the sensor, which will produce darker images. Our previous tip for using a tripod will come in handy for you in this situation. Use a slower shutter speed with a larger aperture is your best bet.
Keep the camera stabilized on a tripod to get sharp photos when you take pictures at a slow shutter speed.
Step 8: Shoot at Multiple Angles
It would be best if you focused on showing your customer as much of the product as possible. Avoid shooting the target from the front, as it will make the target look flat and uninteresting.
Your target should be to provide a good representation of the furniture you’re trying to sell. Ensure you focus on all the dimensions so that the top, side, and front views are visible.
The best decision would be to photograph all the sides at different angles. Mix and match your ideas and see what works.
The more you experiment with this, the better photo you’ll be able to present to the customer.
Zoom your lens to the details and show the customer the specific aspect that makes your furniture unique. A good customer would appreciate stuff like wood grain, etchings, engraving, and fabric patterns.
Step 9: Don’t Forget to Post Multiple Photos
After taking photos from different angles, choose the best 8-10 images representing your furniture the best. The more picture you’ll add to your advertisement, the better the customer can get an idea about it.
Don’t forget, all the images you’re choosing for posting should be very high quality. High-quality images give a layer of authenticity and class that hundreds of words may fail to deliver.
Remember, your customer can’t take a look at your furniture. They’re very far from you; they can’t tell you the exact angel they want to look at.
So why not you try to add them all? As your customers are unable to touch or feel your furniture, you have to give them an extensive tour of your product.
Make it feel like they’re walking all around your furniture, and they’re envisioning it from all angles. Hopefully, that’ll make them imagine that piece of furniture as their own.
Step 10: Post-Production (Photo Editing)
There’s a saying that taking a photo of an object is only 25% of the job. The rest of the job will be in front of a monitor, processing and perfecting your shot.
If you’re looking to generate more traffic with your post, you have to pay close attention to post-processing. Here are a few processing steps that’ll give you the best image possible.
Correcting White Balance
White balance is quite a complicated topic to talk about. Cameras we use for taking photos may or may not provide images with 100% accurate colors. It depends on the camera’s sensor, software setting, or how you captured the image.
Since you’re photographing a product you’re trying to sell, the photos should represent the real color as much as possible. There’s an easy fix for this available on most photo editing software like Photoshop and Lightroom.
On the white balance section, select the eyedropper from the menu. And click on any place of the image that has white or grey color.
Photoshop or Lightroom has the ability to automatically adjust the white balance.
Processing Photos
Out of the Camera, the photos might not look the best. It would help if you processed them a little bit.
Things like adjusting the exposure, contrast slider, adding a little bit of saturation, and increasing the sharpness might do the job. While processing your photo, keep in mind that the colors shouldn’t be changed too much.
Optimize the Look of the Furniture

Optimizing your products on post-production should be the way to go. It would be best to remove any distracting parts like dust, fingerprint, and blemishes from the photo.
Pushing the slider bar up while keeping the highlight bar down will create a cleaner look for the products. Try to keep the image realistic while adding a bit of flair. You can try increasing the saturation and clarity slider a little for a tasteful effect
Presets can Speed Up the Workflow
You might have to go through hundreds of images and select a few and add post-process to them. Sounds dull enough already?
The good thing is, you can streamline this process with the use of presets. You can create your own preset in Photoshop and apply them to your favorite photos for a distinct look.
Or you can search online and get hundreds of presets curated just for furniture. You can use them for your image and get a professional look within seconds. You might have to adjust their levels a little to get the best look.
Some photo editing techniques you can implement on the photo.
Background Removal
If you want to engage the customer at a higher level, consider removing the backgrounds of your furniture. As most of the web pages are presented in white, showing the images on a completely white background will look very modern and professional.
You can remove the backgrounds from the image in various ways. Photoshop gives you a plethora of tools to make your life easier. You can use the magic wand tool, the quick selection tool, and the pen tool for cropping the subject from the background.
If you’re looking for the best possible result, the pen tool will do your job. But using the pen tool requires some mastery of photoshop.
After making a selection with the pen tool, the selection will be saved as paths. You have to convert the paths to a selection and then cut it out of the background. For cutting out, you can use masks or clipping paths.
Clipping Path
After you’ve made a clipping path with the pen tool, you can save the clipping path as a selection. Then use a mask to cut the subject from its previous background.
Then create a new layer behind the subject and fill the layer with white. The edges might still look a little janky and uneven; you can use a soft round brush to even out the edges.
Performing these tasks will need quite a bit of skill and patience. Not to mention you have to do them a couple of times for each of the products.
Outsourcing this job to a professional or an institution will relieve you from a lot of headaches. Many of them work for very cheap too.
Shadow Making
After putting the image on a white background, it’ll look pretty plain and unrealistic because there is one more process you have to go through.
And that is known as shadow making. Objects in 3D space create shadows on the opposite of the light source. There are a couple of types of shadows like a cast shadow, drop shadow, reflected shadow, to name a few.
To create a shadow easily, all you have to do is select the subject layer. Then go to the layer-style dialogue box and choose drop shadow from there.
Put the shadow according to the light cast upon the subject. Adjust the intensity, spread, and blending mode on the option.
You’ll get an object that seems to have space in a 3D environment. For better results, you have to learn it through some trial and error. Again, outsourcing these types of works will save you a lot of hassle.
Final Words
Producing the perfect image for your furniture might seem daunting at first, but it doesn’t have to be. If you go through the steps we mentioned above, you too can easily make the perfect photo.
Most of the steps we mentioned above are relatively easy to perform, and they won’t cost you a fortune.
But if you feel like you can manage to spend a few bucks, definitely check out some professional help. They’ll help you a ton in this regard.
So now you know all about how to photograph furniture for your eCommerce store. Good luck with your endeavor!


0 Comments